It is SO cinnamon bun season if there ever was one. Especially here in London where it has suddenly turned cold. Just look at them so beautifully snuggled. Sorry no in-process pictures. I have high hopes of trying some more cinnamon buns this weekend from the new Hummingbird book that I got for my Birthday :) . So will try to take some then, you can find very good pictures on the blog that I got the recipe from. I used half the amount of cardamom-a tablespoon seemed a little excessive to me and I thought half a tablespoon worked great. I also put chopped pecans in half the batch. I loved them with out any icing and so did everyone else.They are so comforting to make- its lovely watching the spirals swell up in the oven and the house smells amazing. And while we are on the topic of buns smitten kitchen just did a post on some orange and cranberry ones, very seasonal.
15 Nov 2013
1 Nov 2013
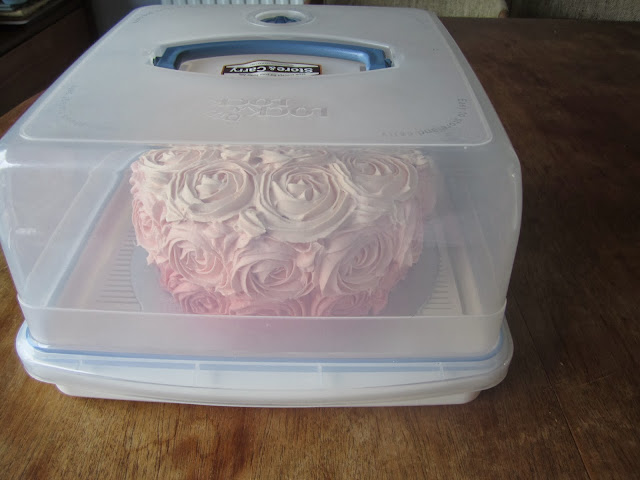
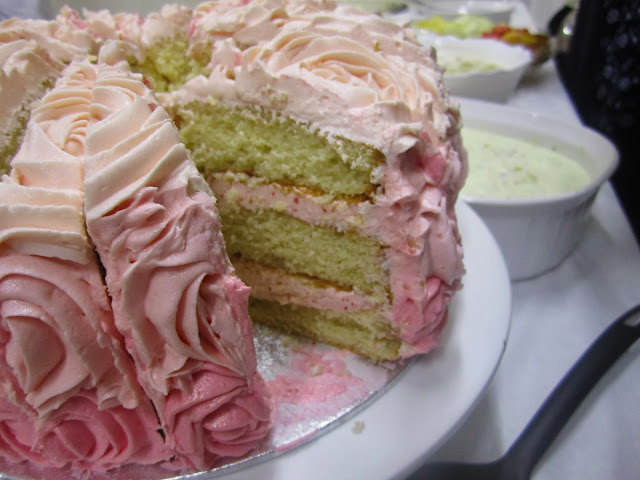
Pink Ombre Rose Cake

I am a little obsessed with ombre cakes at the moment.
Pintrest is a veritable treasure trove of inspiration. As are other blogs. This
rose cake is really not as hard as it looks-all you need is a few Wilton 1 M
tips and some good gel food colourings. I love that it’s simple to do but
stunning to look at – and all edible unlike cakes covered in fondant and
sugarpaste. Although I think cakes look pretty when covered in fondant and
sugar modelled stuff and sugar flowers I prefer cakes to all be edible and I
find myself and others just peel sugar decorations off and leave to one side.
So I trawled the internet (as you do) and found some good
inspiration on Pintrest and here and here. When piping the roses you can
practise on a chopping board or on the actual cake-it’s very easy to scrape a
rose off with a spoon if you go wrong. When doing the three different colours
you can spread some on a chopping board next to each other to see how they will
look. That is probably the most finicky bit of the whole process-separating the
icing and colouring it-the actual piping is very quick! It was a really hot
summers day when I made this so you can see my roses are very soft-the second
time I made this cake (coming soon- a purple ombre one!) it was much cooler so
it was easier to pipe the buttercream and I didn’t have to keep putting it in
the fridge to firm up!
I used a creamy white chocolate buttercream for the roses on
the outside and for the inside it was a standard Victoria sponge and strawberry
meringue buttercream. The latter is a buttercream that is slightly harder to
make but silky smooth and very yummy! I wanted pink layers when you sliced into
it and the fresh strawberries lift the cake a bit. You could alternatively use
whipped cream with strawberry puree mixed through or use the same buttercream
as on the outside. I used Wilton rose pink gel food colouring to colour the icing. I always start with mixing the darkest color first and then
do the two lighter colors You want the dark pink to be quite dark-otherwise
there won’t be a decent enough colour gradation! I crumb coated the cake and
put it in the fridge for about half an hour to firm up before doing the roses.
I have written about
the Victoria sponge here (I made 1.5 times the recipe as I wanted three layers)
and you can find the strawberry meringue recipe here-it is from this Martha
Stewart book. The creamy buttercream recipe is below-I make double and always
have some left over which I freeze. Better to have more than you need in case
you over color one part or something!
 |
| The strawberry meringue buttercream as it progressed-no butter, with butter added and then with strawberry puree added. |
 |
| The creamy buttercream |
Creamy buttercream
Ingrediants:
1 Cups unsalted butter, softened
2 Cups powdered sugar (or more, depending on how you like
your buttercream)
Pinch of salt
2-3 oz. good quality white chocolate, chopped (optional)
¼ Cup whipping cream
¼ tsp. vanilla extract
Method:
Put the chopped white chocolate
into a small bowl.melt over a ban-marie or in microwave. set aside and allow to
completely cool.
Sift salt and powdered sugar over
the butter, in a large bowl. Cream the butter and sugar mixture together until
light and fluffy, scraping the sides of the bowl as needed. Measure the whipping cream into a
cup, and stir in the vanilla extract. With the mixer running on low
speed, gradually pour the cream mixture the bowl.
Once the cream mixture has been
incorporated into the frosting, fold on the melted white chocolate until
incorporated. Increase the mixer speed to medium-high, and beat frosting for an
additional 3 minutes.
Makes about 2 ½ cups of frosting
(I made double for the cake).
Subscribe to:
Comments (Atom)


